Homemade Dry Rub Grilled Chicken Legs: Achieving Crispy Skin and Juicy Perfection
There’s nothing quite like the irresistible aroma of chicken sizzling on the grill, especially when it promises a succulent interior and a perfectly crispy, flavor-packed exterior. Our quest today is for the ultimate
homemade dry rub grilled chicken legs recipe – a dish that masterfully balances a juicy bite with that coveted golden-brown crispness. Forget bland, dry chicken; with a little know-how and a fantastic homemade rub, you can transform humble chicken drumsticks into a star attraction for any meal, from a casual weeknight dinner to a festive holiday gathering. This guide will walk you through every step to ensure your grilled chicken legs are consistently moist on the inside and irresistibly crispy on the outside.
Why a Homemade Dry Rub is Your Secret Weapon for Flavor
While store-bought rubs offer convenience, crafting your own dry rub at home gives you unparalleled control over flavor, freshness, and quality. A homemade dry rub allows you to customize the spice profile to your exact liking – whether you prefer it smoky, sweet, spicy, or a harmonious blend of all three. More importantly, the fresh spices in a homemade mix deliver a much more vibrant and aromatic punch than pre-packaged alternatives that might have been sitting on a shelf for months.
A great dry rub typically consists of a few core components:
- Salt: Essential for seasoning and drawing out moisture from the surface, aiding in crisping.
- Sugar: (e.g., brown sugar, turbinado) Helps with caramelization, creating that beautiful crust and a touch of sweetness.
- Aromatics: Garlic powder, onion powder are must-haves for a savory base.
- Peppers: Paprika (sweet, smoked, or hot), chili powder, cayenne pepper for color and heat.
- Herbs & Spices: Cumin, oregano, thyme, black pepper, and even a hint of mustard powder can elevate your blend.
The beauty of a homemade rub is its versatility. You can start with a basic formula and then experiment. Love a smoky flavor? Add more smoked paprika or a touch of chipotle powder. Prefer a little more heat? A pinch of cayenne pepper will do the trick. This personal touch is what transforms a simple chicken dish into an unforgettable culinary experience.
The Quest for Crispy Skin and Juicy Meat: Brining & Beyond
The promise of "crispy and moist" grilled chicken legs is often made, but truly delivered only when certain techniques are employed. When it comes to grilling, especially over direct heat, chicken legs can quickly dry out. This is where brining comes into play, a critical step often overlooked but absolutely transformative.
The Magic of Brining for Grilled Chicken
Brining involves soaking the chicken in a saltwater solution before cooking. This process helps the chicken absorb moisture and salt, leading to a much juicier end product. The salt in the brine denatures the proteins in the chicken, allowing them to retain more moisture during the cooking process. For grilled chicken legs, where exposure to high, dry heat can be unforgiving, a good brine is your best defense against dryness.
A simple brine can be made with water, salt, and optionally, a touch of sugar or other aromatics like bay leaves, peppercorns, or garlic cloves. Submerge your chicken legs for at least 30 minutes, or up to 2-4 hours, in a refrigerated brine. Avoid over-brining, as it can make the chicken too salty.
Preparing the Chicken for the Rub
Once brined, it's crucial to thoroughly pat the chicken legs dry with paper towels. Any excess moisture on the skin will prevent the rub from adhering properly and inhibit the development of that coveted crispy crust. The drier the surface, the crispier the skin will become.
Next, generously apply your homemade dry rub. Don't be shy! Ensure every surface of the chicken leg is coated, pressing the rub gently into the skin. For optimal flavor penetration, allow the chicken to rest in the refrigerator for at least 30 minutes, or up to 2-4 hours, after applying the rub. This "resting" period lets the salt in the rub begin to work its magic, drawing out moisture and then reabsorbing the seasoned juices, enhancing flavor.
Grilling to Perfection: Techniques for That Golden Finish
Grilling chicken legs effectively requires a combination of high heat for crisping and indirect heat for cooking through without burning. This balance is best achieved with a two-zone grilling setup.
Setting Up Your Grill for Success
For charcoal grills, arrange hot coals on one side of the grill grate, leaving the other side empty. For gas grills, preheat burners on one side to high, and keep the other burners off or on low. Aim for a grill temperature of around 375-400°F (190-200°C).
The Grilling Process
1.
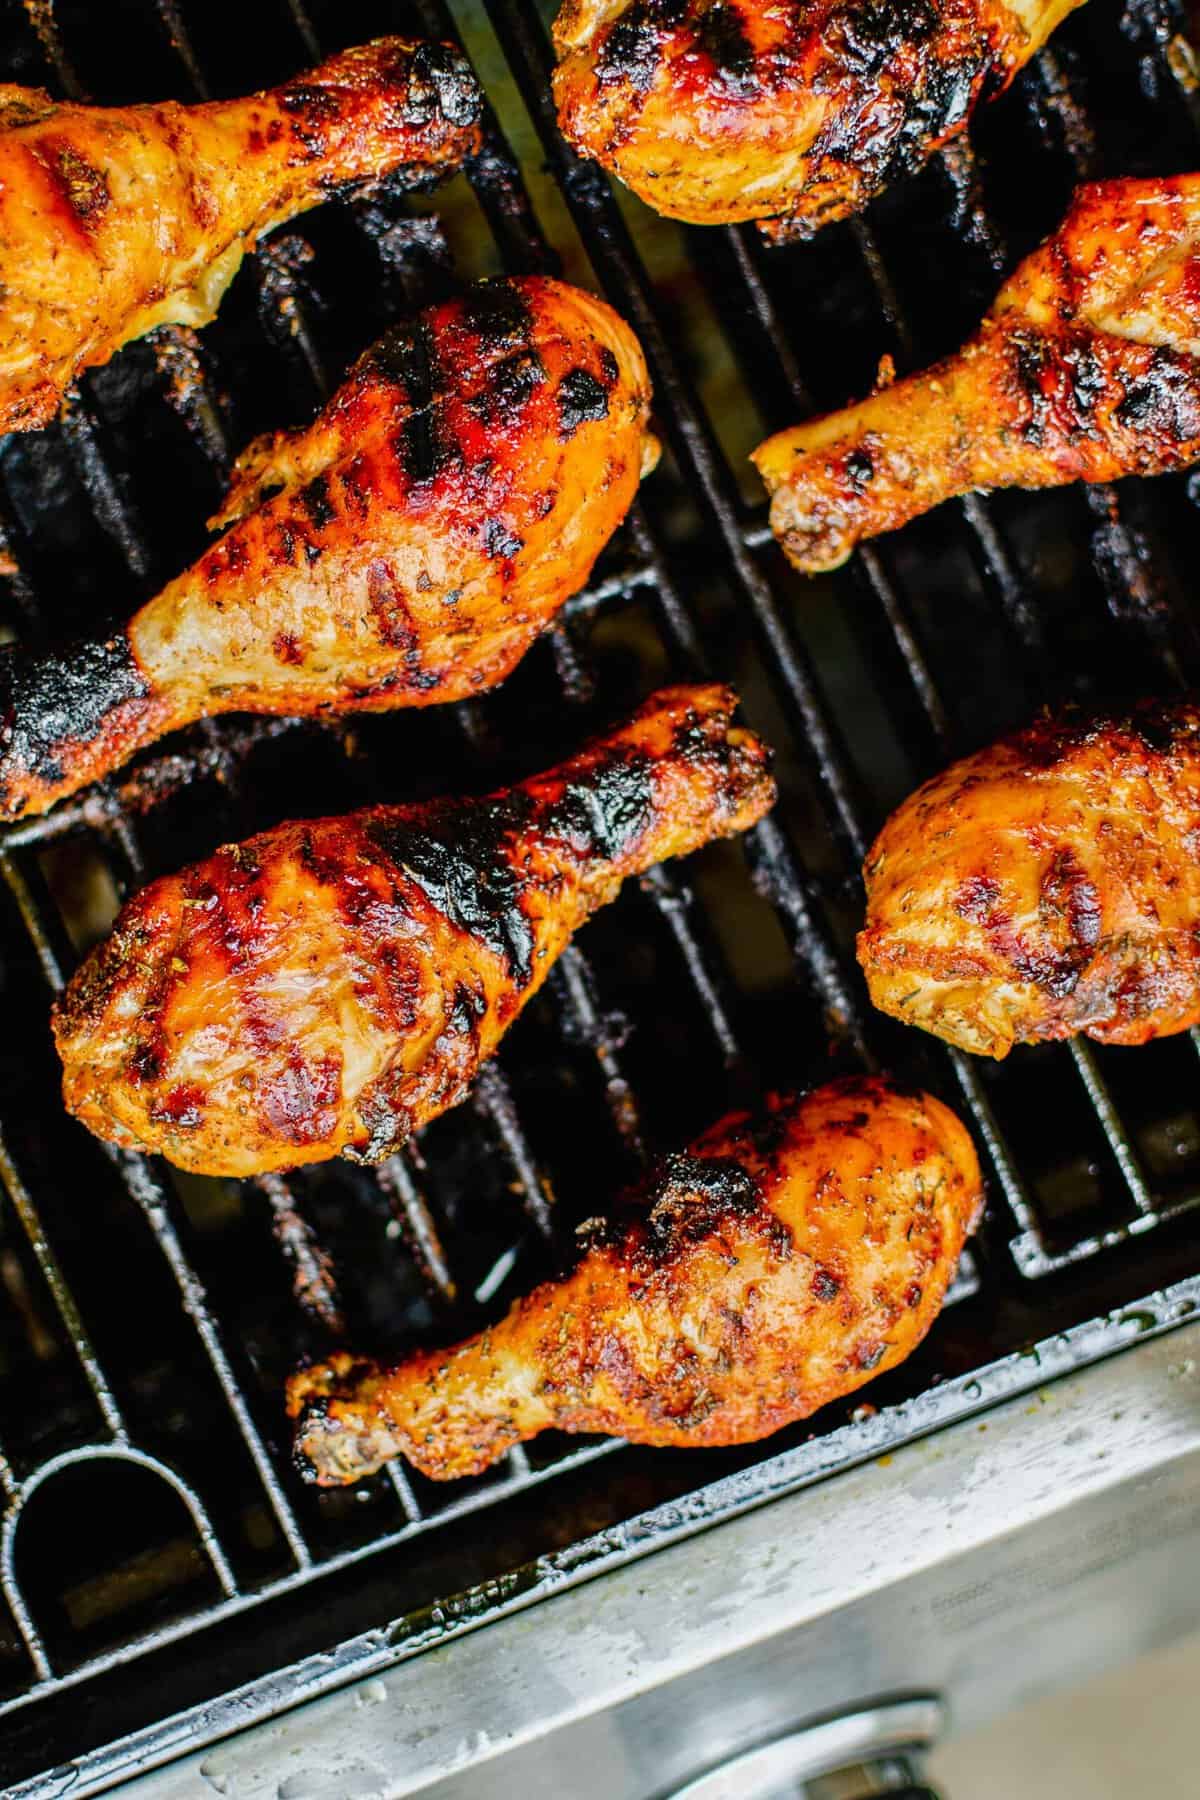
Sear for Crispy Skin: Start by placing the chicken legs over direct heat for 3-5 minutes per side. This high heat will render some of the fat and begin to crisp the skin, creating those beautiful grill marks. Watch carefully to avoid burning due to the sugar in the rub.
2.
Move to Indirect Heat: Once seared, move the chicken legs to the indirect heat side of the grill. Close the lid and allow them to cook, turning occasionally, until they reach an internal temperature of 165°F (74°C). This typically takes about 25-35 minutes, depending on the size of the drumsticks and your grill's temperature. Using a reliable meat thermometer inserted into the thickest part of the leg (avoiding the bone) is absolutely essential for perfect doneness and food safety. Overcooked chicken, even if brined, can still turn dry.
3.
The Final Touch (Optional): If the skin isn't as crispy as you'd like at the end, you can move the chicken back over direct heat for a minute or two, flipping frequently, but be very careful not to burn.
Resting is Key
Once the chicken reaches 165°F (74°C), remove it from the grill and let it rest for 5-10 minutes before serving. This crucial step allows the juices to redistribute throughout the meat, ensuring every bite is as moist and flavorful as possible.
While this guide focuses on traditional grilling, if you're looking for a faster method that still yields incredibly crispy and juicy results, consider an air fryer. Check out our guide on
Air Fryer Dry Rub Chicken Legs: Crispy, Juicy & Fast for a convenient alternative. For those who prefer oven cooking, broiling can mimic the direct heat of a grill for a crispy finish; explore more techniques in
Easy Dry Rub Chicken Legs: Perfect for Holidays & Summer.
Crafting Your Signature Homemade Dry Rub: A Recipe Guide
Here's a versatile homemade dry rub grilled chicken legs recipe that forms an excellent foundation. Feel free to adjust the quantities and add your personal twist!
Basic All-Purpose Dry Rub Recipe
- 2 tablespoons smoked paprika (or sweet paprika)
- 1 tablespoon brown sugar (packed)
- 1 tablespoon garlic powder
- 1 tablespoon onion powder
- 1 teaspoon chili powder (adjust for heat preference)
- 1 teaspoon coarse salt (kosher or sea salt)
- 1/2 teaspoon black pepper
- 1/2 teaspoon dried oregano
- 1/4 teaspoon cayenne pepper (optional, for extra kick)
Instructions for the Dry Rub:
Combine all ingredients in a small bowl. Whisk well until thoroughly mixed. Store in an airtight container in a cool, dark place for up to 3 months.
Step-by-Step Homemade Dry Rub Grilled Chicken Legs Recipe
This recipe makes 6-8 chicken legs.
Ingredients:
- 6-8 chicken drumsticks, skin-on and bone-in
- Your homemade dry rub (approx. 3-4 tablespoons)
- Olive oil or cooking spray
For the Brine (Optional, but highly recommended):
- 4 cups water
- 1/4 cup coarse salt
- 2 tablespoons sugar (optional)
- Optional aromatics: 2 bay leaves, 1 teaspoon black peppercorns
Instructions:
- Prepare the Brine (if using): In a large bowl, whisk together water, salt, and sugar until dissolved. Add optional aromatics. Submerge chicken legs in the brine, ensuring they are fully covered. Cover and refrigerate for 2-4 hours.
- Rinse and Dry: After brining, remove chicken legs from the brine and rinse them thoroughly under cold water. Pat them *very dry* with paper towels. This step is crucial for crispy skin.
- Apply the Dry Rub: Drizzle a small amount of olive oil over the chicken legs (or spray with cooking spray) to help the rub adhere. Generously sprinkle and rub your homemade dry rub all over each chicken leg, ensuring even coverage. Place the rubbed chicken on a plate or baking sheet and let it rest in the refrigerator for at least 30 minutes, or up to 2 hours, to allow the flavors to meld.
- Preheat Your Grill: Set up your grill for two-zone cooking (direct and indirect heat). Preheat to a medium-high temperature, aiming for 375-400°F (190-200°C). Clean and oil the grill grates.
- Grill the Chicken Legs:
- Place the chicken legs over the direct heat side of the grill. Sear for 3-5 minutes per side, turning with tongs, until golden brown and slightly crispy. Watch for flare-ups due to rendering fat.
- Move the chicken legs to the indirect heat side of the grill. Close the lid and continue to cook, turning occasionally, for 25-35 minutes, or until the internal temperature reaches 165°F (74°C) when measured with a meat thermometer in the thickest part of the meat (avoiding the bone).
- Rest and Serve: Once cooked, remove the chicken legs from the grill and transfer them to a clean platter. Tent loosely with foil and let them rest for 5-10 minutes. This allows the juices to redistribute, ensuring maximum moisture.
- Enjoy: Serve your crispy and moist homemade dry rub grilled chicken legs with your favorite side dishes like coleslaw, potato salad, grilled corn, or a fresh green salad.
Conclusion
Mastering the art of
homemade dry rub grilled chicken legs recipe is a rewarding culinary journey. By employing techniques like brining, a well-balanced homemade dry rub, and precise two-zone grilling, you can consistently achieve chicken legs that are bursting with flavor, incredibly juicy on the inside, and wonderfully crispy on the outside. This versatile dish is perfect for any occasion, promising a satisfying meal that will impress everyone at your table. So fire up your grill, mix your rub, and get ready to enjoy the best grilled chicken legs you've ever made!